Saturday, December 13, 2014

Going away present

Pictures are worth a thousand words so what better way to tell someone you love them!

Artsy Fartsy Needs: All the pictures you want, letter you want, and mod podge

When my friend was moving I wanted to make her something that she could remember me by so I made her that T


Figure out how big you want the pictures to be before you glue them down
By laying them down like so


After you decide that's where you want them to be put mod podge on one side to glue them down.
Then mod podge on the other to laminate it down. 


After that let it dry and then you have the prefect going away present!


Friday, December 5, 2014

Fall Nails

These were Fall nails that I did for October and they were really easy

Artsy Fartsy Needs: yellow and red nail polish or paint along with a paint brush

(sorry I don't like to clean off my nails because then I accidentally chip them)


So for this I used red nail polish but then I used two different kinds of yellow paint.

I put 3 spots of paint down on top of my nail polish lid 
(because I don't have a paper plate or I would have used that)
Then I took my small paint brush and just directly put it on my nail.
Constantly did that with one color then moved on to the next and so forth.
After that I put sparkles on it because regular paint looks matte and I don't like that 

Tuesday, December 2, 2014

Bronco Nails

This was last year for the Bronco game I went to and since I'm going again I thought I'd share

Artsy Fartsy Nails 


For these nails I used an actual paint brush 
keep in mind that the brush will get a little hard afterwards. 
The for the football I used brown paint and a clear coat over it

I stuck with all the Broncos colors
and painted their old D on my nail since I can't paint a Bronco

This type of nails would be good for any football team, just change the colors!

Saturday, November 29, 2014

Another Easy DIY Nails

Here's another easy DIY nails 

Artsy Fartsy Needs: Nail polish and Nail art design kit

I love how easy this one is and how unique it looks!


Just fine sparkles that has two colors in it.
Paint one finger those sparkles
two fingers white and the last two each color of the sparkles


With the white nails you paint big and small dots on the nails with both of the colors.
Then you're done. It's really as easy as it sounds I swear!


Wednesday, November 26, 2014

Cute Stocking Idea

Since it's Christmas time I made my boyfriend a easy DIY stocking for his job

Artsy Fartsy Needs: the deign (reindeer), paint, stocking, paint brushes, hot glue gun, pipe cleaners, and scissors 

I saw this design and thought it would be nice on his red stocking


Start with a half C looking thing that will be the face.
Make sure you leave a gap for the red nose.


The to make the antlers are just lines.
They look the same on both side.
Don't go too crazy on the little antlers because you don't want too much on it


Next you should cut the pipe cleaners into 4 like so


Then take two of them and cross them over like a T


Make two T's and cross them over to make this.
To get the little ones on top you'll need to cut the pipe cleaners more.


So take another pipe cleaner and cut them into 8


I wanted to make another snowflake but not the same
so I used only 3 of the 4 and crossed them over.
Then I took the last one and cut it in half and used it for the little ones on the sides.


I took the hot glue gun and glued down the two big snowflakes


Like so.
And I also made a small one that's on the top corner.


Put little black dots for the eyes and the wrote "Let it Snow"
I had my boyfriend write his name so that he can at least say he did some of his stocking :p


I was petty happy about how his stocking turned out!

Happy Holidays!  


Friday, November 21, 2014

Olaf Cup

Im tired of having to pay extra money at color me mine for my DIY cups so I wanted to see if I could make them at home! 

Artsy Fartsy Needs: a cup, sharpies could work but I used these, and a oven 


For this project I wanted to make Olaf because he's the cutest Disney character!!


Start with some basic shapes for his eyebrows, eyes and nose


Then color them in with your pretty markers


Instead of saying "I like warm hugs" I made him say "I like warm coffee" 

After that you'll put it in the oven to bake
I'm sorry but his eyes ended up not staying so I'll update later on the perfect temperature and how to put it in the over but I think my problem was that I didn't let him dry the whole way

Everybody wants the D

I saw this "she wants the D" shirt and loved it!!!
I thought it was a little inappropriate to wear around my family so I made it "everybody" instead.

Artsy Fartsy Needs: sweatshirt, paint, stencils and iron on transferable paper


I painted the words orange with the stencils first.
Then outlines it in white to "clean it up"


After that I did the same thing I did with my Bronco shoes, I cheated.
I took an iron on transferable paper and ironed it onto my sweatshirt. 
(that I got cheap at target btw)
I apparently don't know how to work the iron ons so it again left a faint picture on the sweatshirt.
After that it's kind of like a coloring book.
Followed the faint lines and painted in the D along with the bronco.


And there you go!
A GREAT football outfit :)

Tuesday, November 18, 2014

How to Tie Dye

How to Tie Dye

Artsy Fartsy Needs: white shirts, tie dye, rubber bands, and a place you can get messy


Take the dye mix and add water to it.
If you get the box from Michaels it's easy because they come with nice bottles like this ^^
Also if your dye gets low you can always add more water to the bottle just make sure you have a quarter of dye left in it before you add water. It will dilute it but it will be okay.


Pinch your white shirt where ever you want it and continue to twist in until you have it all together like that vvv


After it's together put rubber bands around it to section off your colors.


You can put how over many rubber bands you want. 
Keep in mind that means different sections of color, 
the one above would just be for 4 color sections 
and the one bellow is for 6.


This is now the part that you want to make sure you are able to get dye all over the area.
I use the garage an put an old blanket down and if there is any dye on the floor I clean it up afterwards.


With your gloves on start the dye process by putting on color in the section at a time.
I started with orange and then blue then orange..etc.


Once your done with the dying process you want to use plastic wrap to keep the dye from leaking.
Keeping it in the sun for a day or two is good because you want to make sure it's fully dry before uncovering it.


This is the final product.
I like the spiral but the color isn't exactly what I wanted.
I probably should have let it dry more but patiences isn't my strong suit.


Thursday, November 13, 2014

Easy Cute Nails To Do

Doing my own nails is one of my favorite things to do because everyone can see them!

Artsy Fartys Needs: Nail polish (2) and a nail art design kit

When choosing what I want to do on my nails I always turn to Pinterest.com/
It's like google pictures but more specific


Since I do my nails myself I try to stick to easier nail designs like dots and lines so that I can do that with both hands
For this design I first painted every other nail a color
then put the opposite color dots on two fingers with my doting tool
then the lines on the pinky with the tool that looks like a little paint brush

So easy and cute to do I love it!


Monday, November 10, 2014

Monsters Inc. Cup

This is another one of my color me mine cups that I made!
Beforehand I figured out what I was going to do and then drew it out so I could practice how to do it.
I looked up different pictures of Sully and Mike and picked the ones that looked the easiest for me to draw.
After that I practiced till I liked what I had made and then I went to go make it.


I wanted to paint Mike and Sully so they each got one side of the cup.
First I took tape dow the middle of the whole cup and painted the whole thing, one side blue and the other side green. 
After that was when I painted their faces.


In the cup is where it got harder. 
I really liked Mikes stuff animal in the movie so for the cup I pretended that it was on the bottom of it.
It was hard to do since its so far down so I messed up a couple of times but the good thing about this paint is that it comes off with water so I could do it again. 


This is still one of my favorite cups that I have made to this day and I've made a bunch!

Friday, November 7, 2014

Color me min cup

I love going to color me mine and painting cups!
One of the past times I made this cup


Usually I like to plan out what I'm going to paint so that I'm not taking time to figure it out when I'm there so I saw this picture on Pintrest and thought it would be pretty cool to do on a cup


It was fairly easy to do just time consuming.
All you do is paint lines all around the cup.


I tried to do a little animal nose on the bottom of the cup to add an extra thing to it.


Monday, November 3, 2014

Pikachu Costume

For this Halloween I was Pikachu and my whole costume I made myself!

I started off with this shirt and I wanted to spice it up so I cut it up but I forgot to take picture while I did it. Don't worry though if you like it I'll be cutting up another shirt later and posting it!

Artsy Fartsy Needs: yellow shirt, hard poster board, one square of felt, pipe cleaners, head band, yellow   black/brown paint, box cutter, cotton balls, and a hot glue gun    
   

Bought this shirt from hot topic!

Poster board from  Michaels. Painted the lightning bolt tail. 


You can paint the end of the tail brown like its supposed to be
but I wasn't wearing any brown so I just did black
Make sure you  cut off the excess  Cut the whole tail out with a box cutter


The felt that you need is the size of a paper 

  
You take the felt and cut them in the triangle like shape for the ears


This is what the ear look like when you're all done!


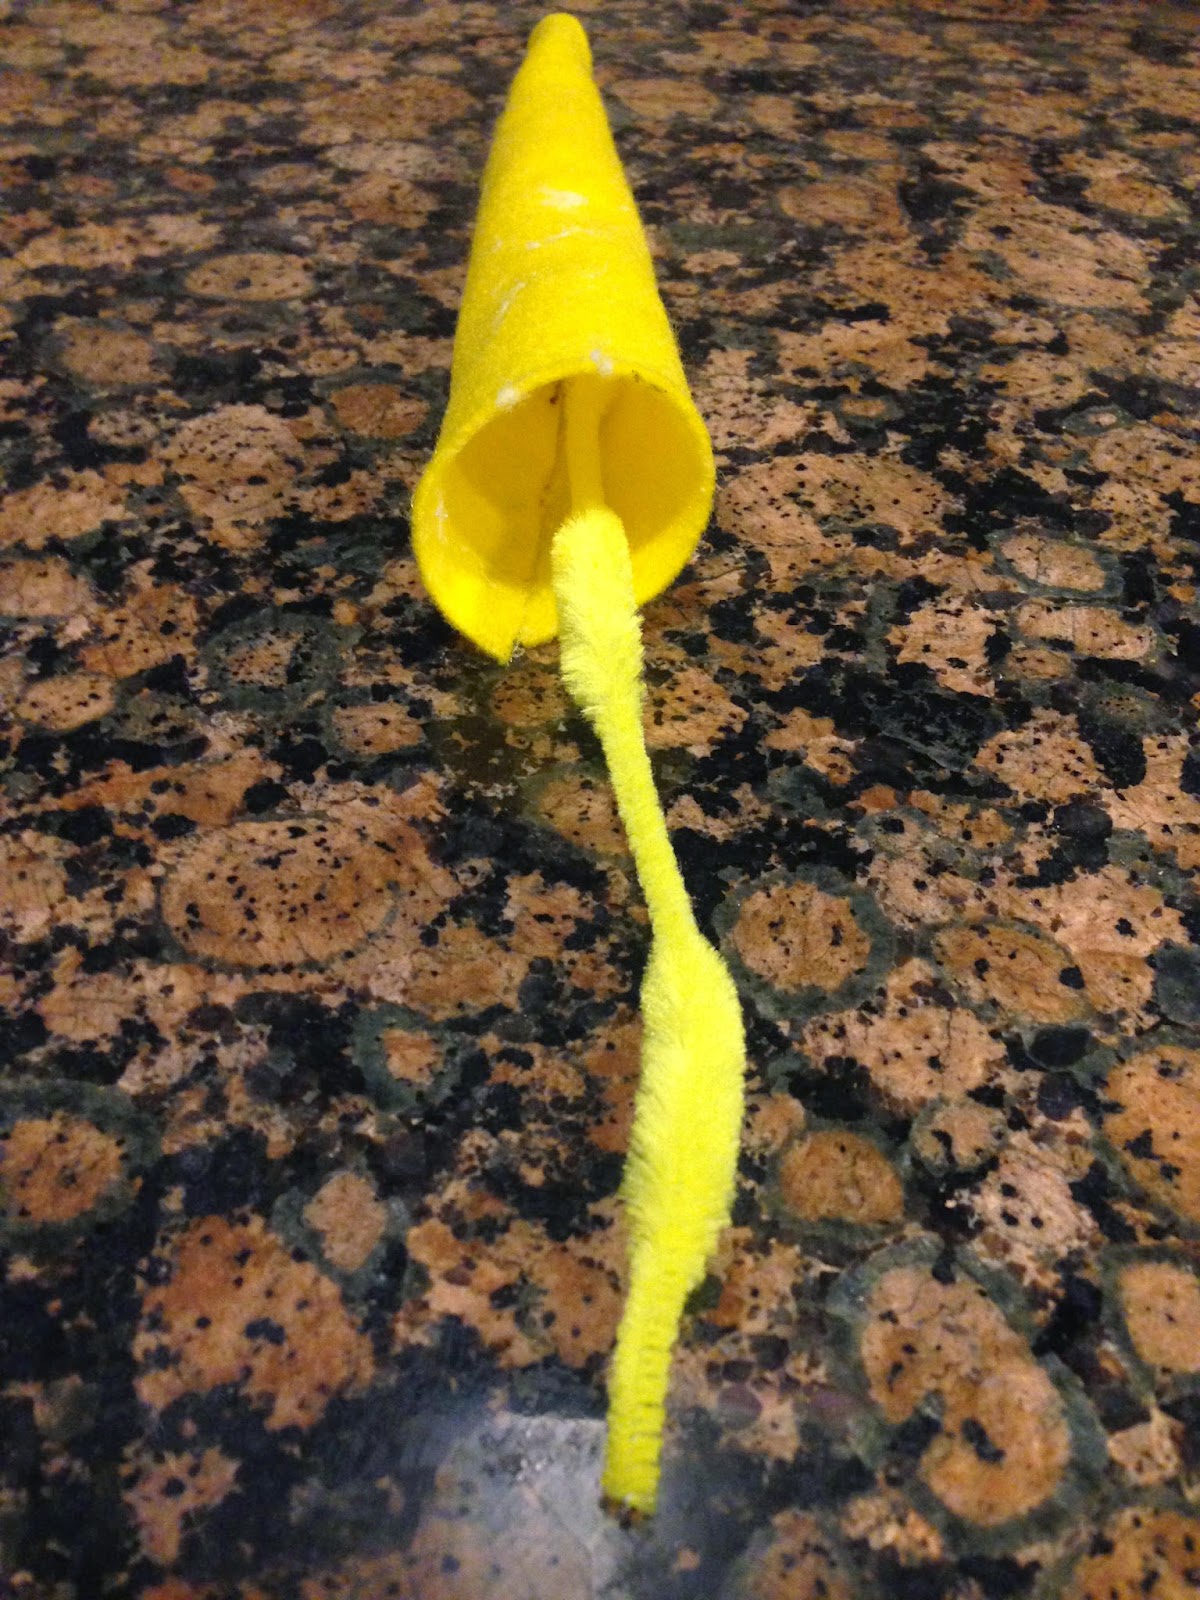
This is the first step to gluing them down, form the triangle and glue it down.


Then glue the whole side down and get ready to stuff it!


Pull the cotton balls apart like so VVV


Stick the pipe cleaner into the ear before you stuff it and glue it down


After all the ears are stuffed you'll glue them down. 


At the end like so, then you'll glue it around the headband. 


Take the excess felt left over and glue it down on the head band and figure out where you want the ears to be glued down and glue it! 


After that you'll paint the tips of the ears black, I painted it at an angle. 
I think I might have put the ears too close together but you can judge where you want to put them. 


This was my make up! :)


And this is everything put together!!


I didn't know how to put the tail on so I just taped it. 
If you can think of another way to put it on your shirt go for it!