Tuesday, September 30, 2014

Lollipop Ball

The next few artsy fartsy things are going to be from my birthday party last year!

This was a party favor/ center piece that was easy and quick to do.

Artsy fartsy need are: Dum-dums, a styrofoam ball, and a bowl.


You can choose how big of a ball you want to use, keep in mind that you'll be using half because the other half will be in the bowl. Then you take the dum-dums and stick them into the ball, try to keep them all close together while you do it or you will have odd gaps in-between them. After you have about half of the ball covered try and stick it into the bowl and see if you need to add more or less. And if you didn't want to have the lollipop ball in the bowl you could always put a stick through it so it would be a super lollipop. I thought it was just easier to put it in a bowl than try to balance it on a stick. 
This was such an easy thing to do and everyone thought it was such a cute idea! Plus since it's hard candy I got to keep it for a while after my birthday! I set it by the door so when people would come over they could just take a lollipop on their way out.


Friday, September 26, 2014

Cupcake Cones

This is some more baking fun artsy fartsy stuff that is easy to do!

If you like cupcakes and ice cream cones this is the project for you!


All you do is take cupcake mix and put them in the cones instead of putting them in a cupcake pan. In order to bake these though I put the ice cream cone (filled with the mix) in the cupcake pan so it would have some balance. After they were done baking the tops will rise and you just need to cut them off to flatten them out and put the icing on them.  


In order to make the nice swirl on the cupcake cones you dump most of the frosting you have into a ziploc bag and make a little cut into the corner of the bag and hand swirl it over the cones. The cute little birthday decorations I have on the cupcakes were from Michaels and they were really cheap! Perfect to add a little flair to the cupcakes.  


Note to self: I ended up with way too many ice cream cones so consider how many people are coming because odds are, if you have a cake and cupcake cones they will only want one of the cones and you will be left with SO much extra.


Tuesday, September 23, 2014

Tie Dye Birthday Cake

This is a fairly easy and fun project to do. 
If you know how to bake a cake then you can do this!

First I got some cake mix from the store, any white cake mix will do, and I also got food dye to color the cake with. Then you put how ever many color you want in their own bowls and dye them, for me I used five. After that I put the cake colors in one at a time (I got too excited  about the cake and forgot to oil the pan, so don't forget!). To make the tie dye look I took a toothpick and swirled the colors together like the picture shows. 


Waited for it to bake and then took it out and it looked so beautiful! 


Final product! 


(I made two cakes so it's double layered)

Sunday, September 21, 2014

Baby Shower Motorcycle

This will be a long one because I'll go step by step on how to create a motorcycle made out of all baby stuff, a perfect gift for your next baby shower!

I want to give credit to http://www.sweetaprils.com for giving me the step by step tutorial to do this! 
(If you want to see more examples go there) 

Your arty fartsy needs are: 34 diapers Pampers Swaddlers Size 1 (17 for each tire), 8" cake pan, 3 rubber bands, 2 receiving blankets (30x30 approx), 2 bibs, a pair of socks or mittens, a baby bottle, 1 washcloth, scissors, pins, a stuffed animal (size approx between 15" and up to 20"), and decorative ribbon.   


First you will have to make the tires by putting the diapers into the cake pan.


When you use all 17 diapers the tire will then be ready to put the rubber band around. 
I used some extra large rubber bands laying around the house that was perfect for it but you can use normal ones too.


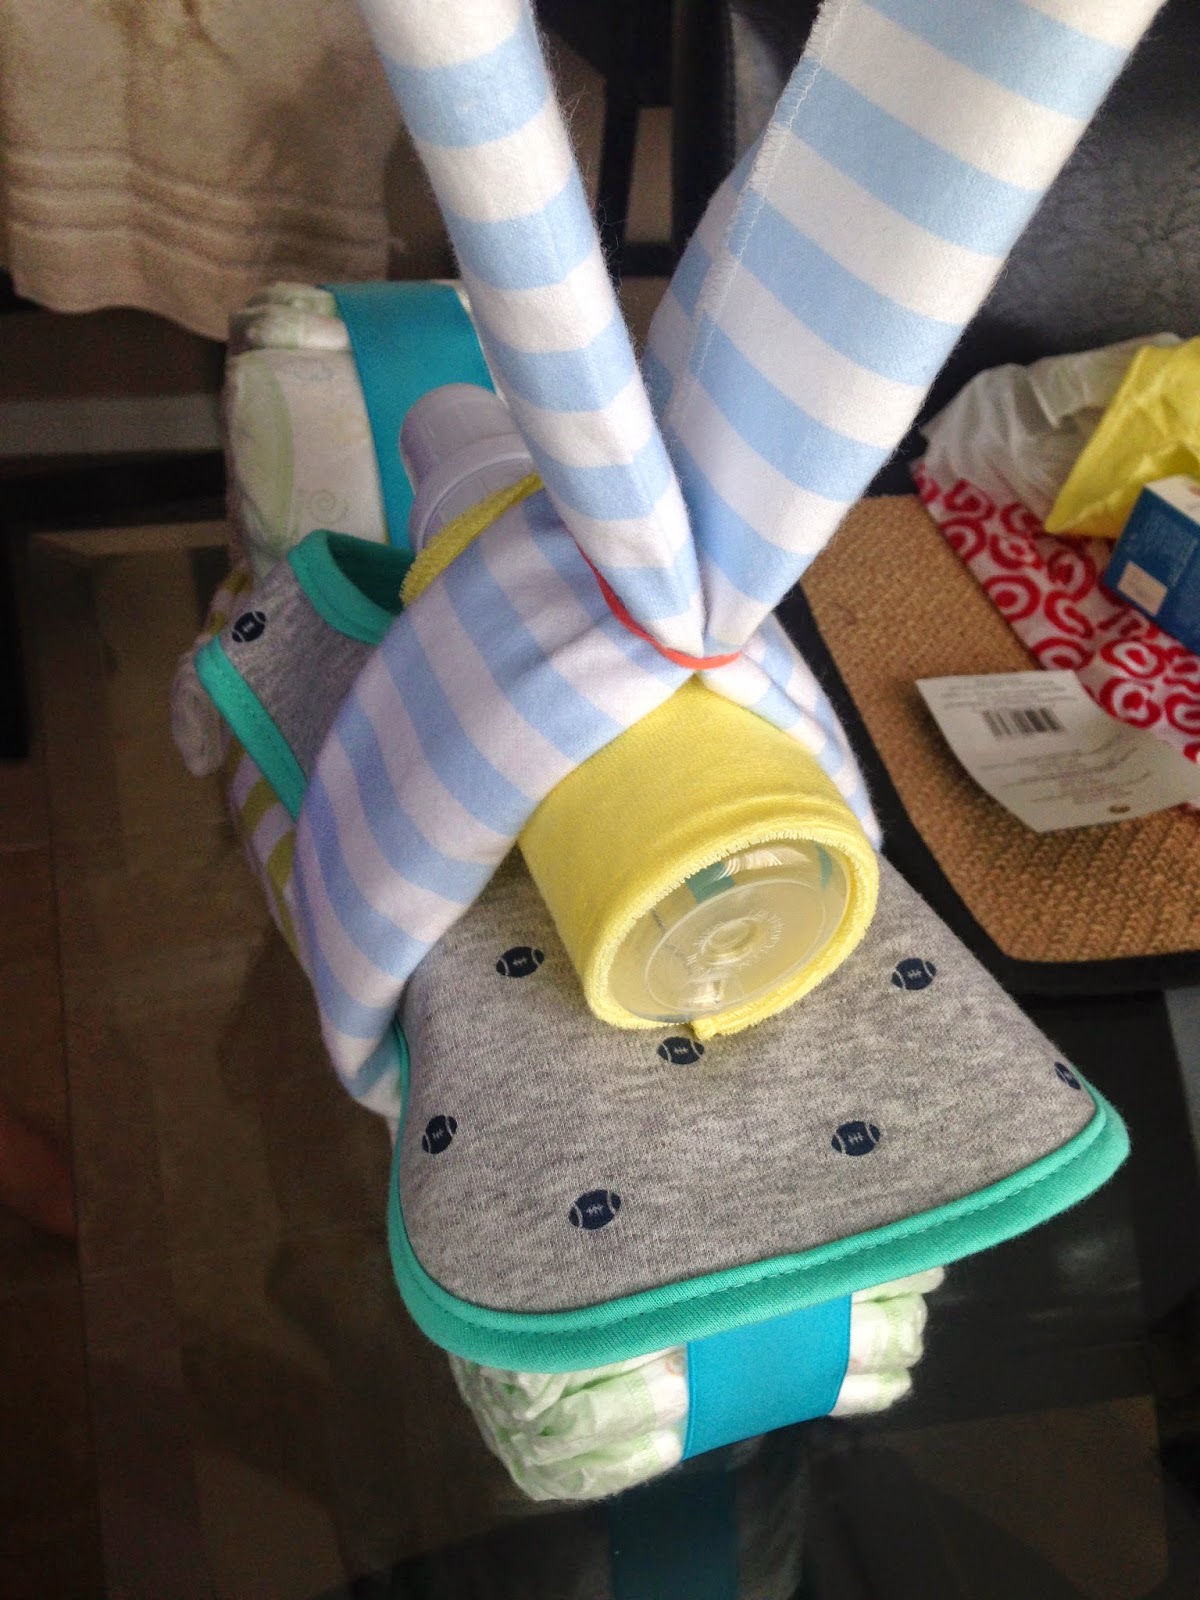
You fold the receiving blankets in half then fold them up like the picture bellow.


You first put one of the blankets through both of the tires to secure them together, you will have to pin them down to each other as you will later see.


You want to make sure the ribbon is on the tires before you secure them down!! 
I pinned the ribbon to the diapers and then put that part on the bottom so no one can see.


Pin the blanket down like this.


Afterwards you'll want to pull the other blanket through the first tired for the handle bars.


First put the bib on top of the tire, roll up the wash cloth around the bottle, take the blanket and secure it with a rubber band (sweetaprils said to use a chain link toy but I didn't want to buy that). After I put the rubber band around it, the blanket was flopping over so i tied a bow around it which helped it stay up. 


To keep the handle bars stiff I put half of a toilet paper roll in the blanket.


You could roll up a wash cloth or use tissue paper to stuff the socks but there was enough blanket left over for me to not need to do that. 


This was the bow i made to help the handle bars stay up.


Tada!!


I took the ribbon I had left to make this bow for the bear. 
I stuck a pin in the bow then wrote the to and form and pinned it on him. 
So perfect of him!


Tuesday, September 16, 2014

Wall-E and Eve shoes!

Wall-e is one of my favorite movies so I decided to be arty fartsy and paint shoes of wall-e and eve! 
Again I bought the shoes from Rite Aid. 
First I drew them both out on paper, they were pretty easy to draw 
because they are mostly made of shapes. 


I took a pencil to my shoes and drew them and then painted them in. 
I painted the sides of the shoes sparkly blue because it reminded me of the the scene where wall-e has a fire extinguisher in space but you could leave them plain if you wanted. 

Saturday, September 13, 2014

Football Artsy Fartsy Things

So in honor of the fact that I'm going to the Chargers game this weekend I'll share my football artsy fartsy things!

Lets first start with my shoes!  


These shoes are again from Ride Aide because they're cheep. My dads girlfriend is the chargers fan (BOOOO) and I'm the broncos fan (YAYY)!


The chargers shoes were the easiest to make because I stuck with their lightning bolt. For the words I used some stencils I had laying around the house but you can get them from Michaels along with the paint I used. You first need to try and plan out where you want to start your word and where you want it to end because you want to make sure you have enough room when you paint it. Using a pencil is a good way to plan our where you want things to go. For the bolt I drew it a couple of times on a piece of paper till I had it down then just copied it over to the shoe, first in pencil and then in paint. I think that bordering the letters in black helps make it look nicer and cleaner incase you made some mistakes.


The bronco shoes, my team, was more challenging because...well... it's a horse! I'll let you in on my big success secret..... and it's cheating! I'm artsy yes but I am not the kind of artist that can draw a horse, I'm good with shapes and such. So how I cheated was by trying to take iron on transferable paper, that you can get at Michaels (like everything else), and iron it onto my shoe. Well I guess I just don't know how to do that right so it didn't get ironed on. It did however leave a faint outline of the bronco, it was enough for me to trace over all of it with paint and voilà I had a bronco. 


This was my favorite part of the shoes! The back side was shaped perfectly like a half of a football so I just had to paint it as such! I finished off the shoes in another color that the team was so it could have a good contrast.


And then to finish it all off I had to have my make up done! I took orange first and put it in the crease of my eyes, then blue on the side, blended orange and blue in the middle, and then put some orange and blue under my eyes that lined up in the same spot as above. My make up made for the awesome final touch! Then I was ready to see my boys win!


Tuesday, September 9, 2014

Melted crayons

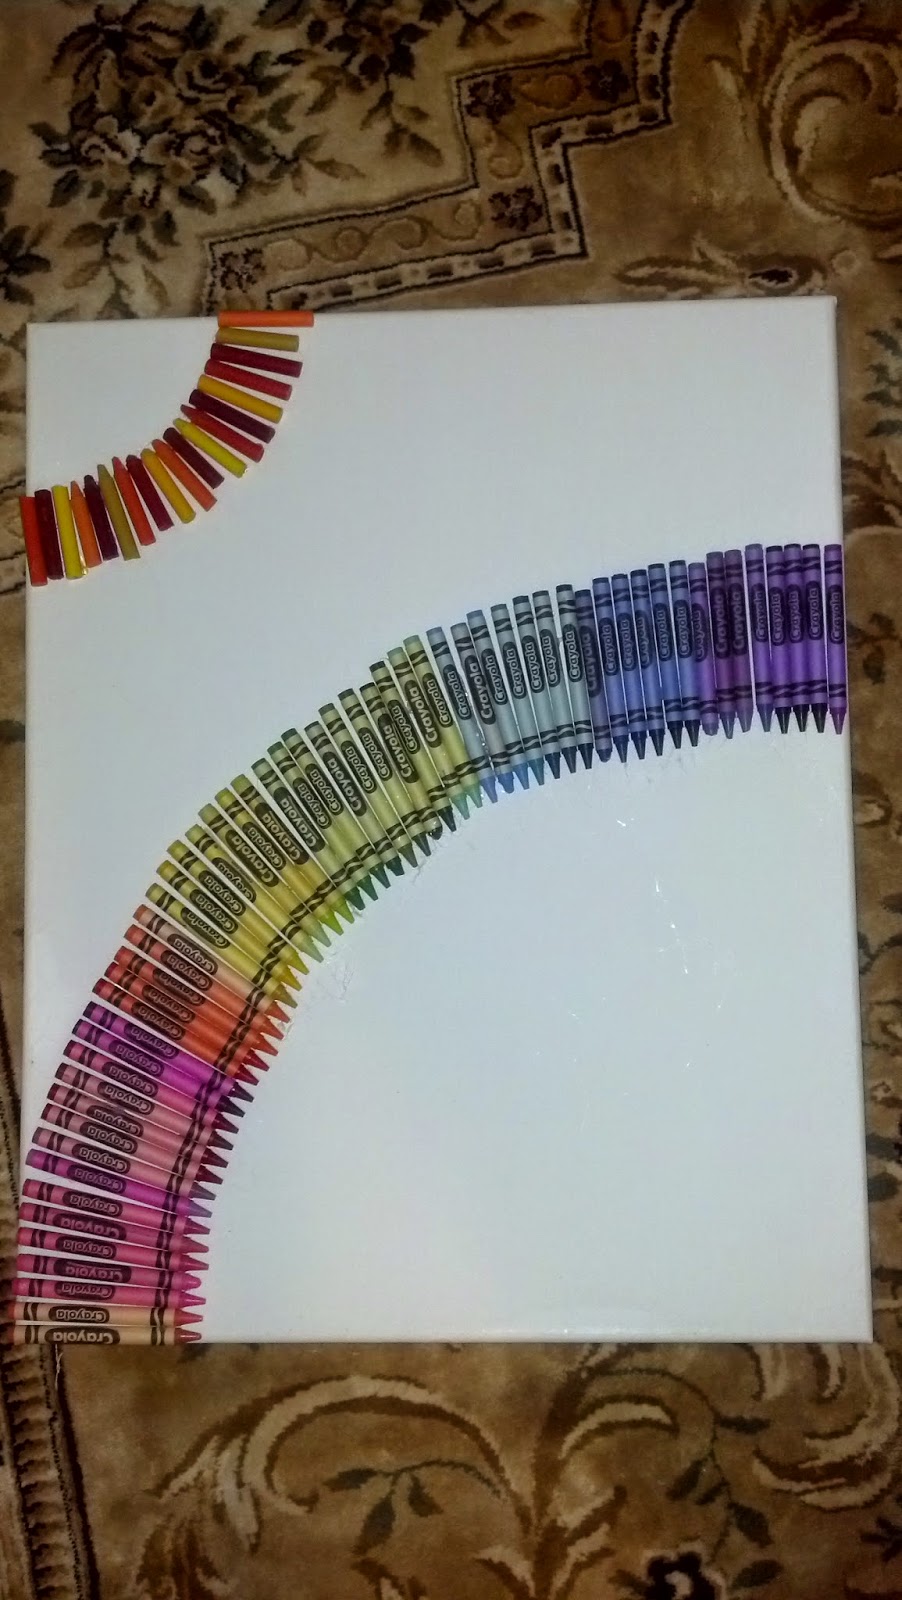
Melted crayon project

For this project you will need crayons, a canvass, a hot glue gun, news paper to lay down, and a blow dryer. 

I started off thinking it would be a good idea to peel off the paper on the crayons but I was wrong. I only peeled the paper off the sun crayons and kept the rainbow paper on because it was too much of a hassle. I then planned out where to glue down the crayons and then glued them. After they dried I put news paper out on the floor just incase some of the wax of the crayons came off of the canvass when I was blowing it dry. I took the blow dryer and blew it super close to the crayons to melt them and move the wax down the canvass. For the sun I took a yellow crayon and melted the yellow crayon in the corner and the rest down the canvass. This project is so much fun to do with friends and you can also do it multiple times because you can do many different things with the crayons. I hope you have as much fun being artsy fartsy as I did! 


Friday, September 5, 2014

Splatter Painted Shoes

One of my favorite artsy fartsy things to do is paint shoes! I buy they from Rite Aid because they are around 10 bucks but you can pick whatever kind of shoes you want! For this pair I decided to splatter paint and draw shapes on my shoes. As you can see splattering paint onto shoes can be messy so make sure you put some paper down or are in an area you can get paint everywhere. First I taped off the part of my shoes I didn't want splattered and went at the rest of the shoe with paint. I waited for the shoes to dry a little then I took the tape off and painted different shapes on the part that was taped up. It was actually hard to think of that many shaped to use so I recommend looking up tribal symbols so you can get ideas. 

Then this is the finished product! And I was pretty stoked at how they turned out! Plus they matched my pants :p

Tuesday, September 2, 2014

4th of July make up


This was my 4th of July make up a couple of years ago that I did. 

I started with the white in the corner of my eyes because light colors look better in the corner (by your nose) and then darker colors going outwards. I blended the colors in by going back and forth with one color, red mostly. I then took my liquid eyeliner and drew some stars on the side. I fished off this look with some red lipstick. I recommend testing this out before your 4th of July party just in case you can't get the starts right. 

Make up tip: if you get your brush damp and then put it in your eyeshadow it makes it brighter!